Showing posts with label Food - Poultry. Show all posts

April 3, 2011

Top 11 Recipes...Ever

Well, maybe not EVER.

But how about the top 11 recipes on Sunshine and Jellybeans?

In case you were wondering, 11 is my favorite number.

That's why it isn't the top 10.

Click on the name of each recipe to go to the post (and don't forget that at the bottom of each post, there is a link to the printable recipe for your convenience!)...

Try them all!

Let the drumroll begin...

11. Ham and Swiss Cheese Mini Frittatas


Or Canadian Bacon and Pepper-jack Cheese Mini Frittatas, or Bacon, Cheddar and Jalapeno, or red pepper, mushroom, and onion, or...the possibilities are endless!


This one kind of surprised me...not that I don't think that these are little bites of delightfulness - because I do. They are a great twist on your every-day deviled eggs! It's just that they never seemed to get much attention when I first posted the recipe. But it has slowly climbed it's way up into the top 10!


Sorry for the crappy picture...next time I make these I will post new pics. This is a recipe that I keep going back to over and over again. Another one that is pretty customizable, and very, very good.


I made this recipe again last night for the kids. It's definitely a keeper. Gooey, cheesy, creamy deliciousness. And did I mention it is kid friendly? Score. (Thanks Steph!)

7. Finger Lickin' BBQ Chicken


This is a classic. What else can I say? Who doesn't like BBQ chicken on the grill???


YUM. I want this right now. The key to this recipe is the crushed up croutons...and a great marinara sauce... which is still a work in progress for me. Steve and I made and canned some this winter that was amazing...but of course I didn't measure anything or write anything down. I'm working on it. But anyway - this Chicken is fabulous and is definitely one of my favorite recipes.

5. Chicken Noodle Soup


The ultimate comfort food. However, the key to this recipe is this:

4. Homemade Chicken Stock


Trust me: homemade chicken stock is the key ingredient to taking your homemade soup to the next level. It's just better. And better for you. I know that it is time consuming, but try to make it in large batches, so that you can freeze a bunch to use later. Mmmmmm Mmmmmm good.

Are you starting to get excited for the top 3??? ME TOO!

Where is that drum roll???

3. Spicy Chicken Tostadas


I pulled this recipe out of my ass. Steve kept going on and on about this Tostada Ensalada that he had at a restaurant and loved. And Steve doesn't get very excited about food...not the way I do, anyway. So I asked him to describe it to me, and I got a relatively vague answer (because people who aren't obsessed with food don't mentally deconstruct every meal that they eat away from their own kitchen). But the idea of tostadas got stuck in my head, and when I finally went to make them, this is what I came up with. DELICIOUS. Keep reading for the key ingredient...(hint: it's the #1 recipe)


This one is kinda unfair, because it's two really good recipes in one post. I don't know why people keep coming back to it - if it's the Pulled Pork or if it is the coleslaw...but I hope it is for both. Because the Pulled Pork isn't complete without a big spoonful of coleslaw on top...trust me. And don't forget the pickles! This is a go-to crowd pleasing lip smacking belly satisfying recipe for any season. Family friendly. And the crockpot does a majority of the work. How can you beat that??? 

And now...the moment you've all been waiting for!

The number one recipe in the world in the country of all time on this blog...

1. Spicy Shredded Chicken


Awwwwww yeah. It really shouldn't surprise you. There have already been two recipes on this countdown that have this as the key ingredient (#9 Chicken Enchiladas and #3 Spicy Chicken Tostadas). And don't forget that you can also use this chicken to make tacos, quesadillas, nachos, or my Spicy Chicken Tortilla Soup! How versatile is that??? Go ahead, double or triple the recipe. Make a huge batch and freeze the rest for later use. And - if you don't feel like grilling it, make it in the oven. Of course the grill is the best way to do it because of the lovely flavor it imparts, but if you are in a bind, just cook it in the oven at about 375 degrees, turning occasionally until the chicken is cooked through.

Thanks everyone! Try one or all of these recipes very soon, and don't forget to ENJOY!!!

March 29, 2011

Recipe Revamp: Chicken Stir Fry

Happy Spring Everyone!

Steve and I spent a lovely weekend with my family up at the cabin last weekend.

It was just what the doctor ordered.

I actually got sunburned.

Seriously.

It was the last hurrah before the ice starts to melt.

The next time we go there, it will be by boat.

I'm ready!

But in the meantime, how about a yummy recipe for Chicken Stir Fry?!?!

If you need any further proof that I am a nut job, read the original post here.

Yikes.

As a note: You can sub in whatever vegetables you have on hand - asparagus, zucchini, water chestnuts are all good substitutions. Also - to switch things up, instead of using hoisen sauce (which is a like a sweet asian bbq sauce), you can sub Thai sweet red chili sauce. It will give it a totally different (but delicious) flavor.

Also - 1 cup equals 16 tablespoons. 1/2 cup equals 8 tablespoons. Just so you know!

Here is the recipe without all the crazy talk.


Yay - can you tell that the days are getting longer here in the frozen tundra? I actually have some natural light to take pictures in!

Chicken Stir Fry  (serves 6)
  • 1 lb boneless, skinless chicken breasts - cubed
  • 2 teaspoons minced ginger
  • 3 cloves minced garlic
  • 1/2 cup low sodium soy sauce, divided plus more for serving
  • 1/2 cup hoisen sauce, divided
  • 1/4 teaspoon crushed red pepper flakes to make it spicy!(optional)
  • 2 - 3 tablespoons peanut oil
  • 1 tablespoon sesame oil
  • 1 tablespoon corn starch
  • 1/3 cup chicken broth
  • 5 cups mixed vegetables, cut into bite-sized pieces (I used onion, bell peppers, pea pods, carrots and broccoli)
  • 3 - 4 cups cooked white rice (or brown rice, if that floats your boat)
Marinade the chicken in the ginger, garlic, 4 tablespooons of soy sauce, 4 tablespoons of hoisen, the crushed red pepper, and the sesame oil. Let it marinade for at least 30 minutes (up to 2 hours).

While the chicken is marinading, wash and cut your vegetables and make your rice according to package directions.

Mix the remaining soy sauce (4 tablespoons), the chicken broth, and the corn starch in a separate bowl. Set aside.

Heat the peanut oil in a wok over medium high heat.

Add the chicken and stir fry for a few minutes or until the chicken is just cooked. Remove to a separate bowl.

Heat another tablespoon of oil (if necessary) and throw in the veggies, stir fry until crisp-tender.

Add the soy/broth/corn starch mixture and the chicken to the veggies. Turn the heat down to medium low and stir around to coat until the sauce gets thick. Yum.

Serve over rice (make sure to spoon some yummy sauce to put over the top too) with extra soy sauce as needed.

Enjoy!


Printable Recipe

March 21, 2011

Recipe Revamp: Sun-dried Tomato Pasta Salad

Come to mama.

This is one of my all time favorite dishes.

The flavors are just amazing and it is a great change from traditional Italian pasta salad.

But don't get me wrong, I love traditional Italian pasta salad too.

Just wanted to clear that up so there weren't any hard feelings.

I made this last week for the 100th time, and I realized that the original post about it was confusing and disjointed (why doesn't that surprise me???), so I thought I'd post a new, organized recipe.

As mentioned in the original post, this recipe was an Ina Garten (Barefoot Contessa) recipe, which was revamped by the Pioneer Woman. I chose to use less olive oil and more vinegar than PW though (surprise!). I also sometimes add rotisserie chicken.

It's a "Must Try" recipe if you love sun-dried tomatoes.


Yum - these are a few of my favorite things...tomatoes, fresh basil, and kalmata olives. Look at those colors! During the winter, you may have a hard time finding yummy cherry tomatoes, but don't fret - you can leave them out if you have to.


Making the sun-dried tomato dressing in the blender...


Major YUM.


This one doesn't have cherry tomatoes, but has the addition of rotisserie chicken to make it a delicious one-dish meal.


Sun-dried Tomato Pasta Salad (serves 8)
  • 1 package of rotini pasta
  • 1 pint of cherry tomatoes, washed and cut in half
  • 1 cup (loosely packed) basil, chiffonaded 
  • 4 ounces pitted kalmata olives, drained and chopped (you can  use more or less to taste)
  • 10 ounces sun-dried tomatoes packed in extra virgin olive oil
  • 4 cloves of garlic, minced
  • 3 - 4 tablespoons red wine vinegar
  • 1/2 cup of olive oil
  • 1/2 teaspoon fresh cracked pepper
  • 1 cup shredded Parmesan cheese
  • 2 cups of rotisserie chicken, chopped (optional)
For the dressing:

Put the sun-dried tomatoes and the oil they came in to a blender or food processor. Add the garlic, red wine vinegar and black pepper.

Puree, adding more olive oil as necessary (up to 1/2 cup).

I would recommend putting this in a jar in the fridge for a couple hours to let the flavors combine, but you don't have to.

Cook the pasta according to package directions, drain and rinse with cold water.

Combine the pasta, tomatoes, basil, olives and dressing in a large bowl - stirring to combine. Add half of the Parmesan cheese, stir to combine.

Sprinkle the remaining cheese on top, serve and ENJOY!

Please note: If the leftovers become dry, you can add more red wine vinegar and olive oil to moisten.

Printable Recipe

February 20, 2011

BBQ Chicken Sandwiches and Kempton Update

Kempton had his second surgery last Wednesday.

I picked him up from the vet on Friday at noon.

Much like his 1st surgery, he was really whiny and obviously in pain.

This time seems to be worse than the first time though.

The whining has lasted a lot longer (or at least it seems that way), his incision looks scarier, has more bruising around it, and seems more swollen.

The surgeon said that we need to take things even slower this time around because he will take longer to heal.

The good news is that I have managed to keep his cone on this time, so hopefully his incision will heal a lot faster, with less scarring.

Hopefully he will start feeling better soon - I will keep you posted!

I mentioned in my last post that last week we were blessed with some warm, sunny, spring-like days.

One of the nights we had a fire on the deck and ate BBQ chicken and coleslaw.

It was wonderful and made me anxious for spring.

Today it is freezing cold, with 40 mile per hour winds and snow.

Mother nature is such a tease.

Anyway!

I had one leftover chicken breast, and a little bit of coleslaw, so I made this sandwich.

It is modeled after my Pulled Pork sandwiches, with the addition of pepperjack cheese.

Holy delicious, Batman.

Here's the food porn:


If you don't already have a grilled BBQ chicken breast, you could substitute rotisserie chicken or just regular chicken breast instead.

As usual - check out the printable recipe at the very bottom of the post for a photo-and-rant-free version.

Yeah, baby.

BBQ Chicken Sandwiches (makes 2 sandwiches)
  • 1 boneless, skinless chicken breast, grilled
  • 2 whole wheat hamburger buns
  • 2/3 cup of creamy coleslaw
  • 2 tablespoons BBQ Sauce
  • 2 ounces pepperjack cheese, sliced
  • 2 medium sized dill pickles, sliced thinly
Cut each bun in half, place cut side up on piece of aluminum foil on rack in oven. Turn the broiler on low and leave the oven door cracked. Check frequently (don't walk away). When buns start to get crispy, add pepper jack cheese to the bottom halves of the buns. Continue to broil with the door cracked until the cheese is starting to melt and the buns are getting slightly brown.

Slice the chicken breast thinly (warm it up if it's not warm already). Divide the chicken in half between the 2 buns.

Top each with 1 tablespoon BBQ sauce, 1 pickle and 1/3 cup of coleslaw.

Enjoy!!!

Printable Recipe

Recipe Revamp: Pasta with Lemon, Basil and Grilled Chicken

Last week, we were given a gift in the middle of a long, cold, snowy winter - 5 days of warm, spring-like temperatures.

It was even sunny a couple of the days.

We just had to break out the grill.

I had a craving for this light, lemony pasta with grilled chicken. I hadn't made it since last summer.

There were three of us.

I made enough for 6.

There were no leftovers.

Enough said.

Here is the link to the original recipe post from last August:

Angel Hair Pasta with Lemon, Basil and Grilled Chicken

I added cherry tomatoes that I had on hand that needed to get used.

I also noticed that this time the lemons made a lot more juice...they must have been perfectly ripe. This just means that I had more sauce this time and was able to use just over a half of a package of pasta.

I added some salt and pepper, and a little more basil and white wine to the dish as well.

It was so good and absolutely perfect to break up the winter blahs.

Take a look:


YUM.


Pasta with Lemon, Basil and Grilled Chicken (serves 6)

For the chicken:

  • 1 lb boneless skinless chicken breast
  • Juice of one lemon 
  • 1/4 cup of dry white wine
  • 1 - 2 cloves of garlic, minced
  • Salt and Pepper
Combine all ingredients in a zip top bag and let marinade for at least one hour.

Preheat grill to 400 degrees.

Cook chicken indirectly until cooked through. Set aside to cool.

Once cool, cut into bite sized pieces. Set aside.

For the pasta:

  • 1/2 package of angel hair pasta (about .5 pounds)
  • 4 lemons, juiced (remove any seeds that fall into the juice)
  • 1 bunch of asparagus, washed and trimmed, then cut into 1.5 inch pieces
  • 1 pint of cherry tomatoes, washed
  • 3 cloves of garlic, minced
  • 1/3 cup of basil, julienned
  • 2/3 cup of dry white wine
  • 1 tablespoon butter
  • 1/3 cup of olive oil 
  • 1 teaspoon fresh cracked pepper
  • 1/2 - 1 teaspoon sea salt, to taste
  • 1 cup of Parmesan cheese, grated
Cook pasta according to package directions.

Melt butter in the bottom of a large skillet over medium heat, saute garlic and asparagus until asparagus is crisp-tender.

Add wine and tomatoes, cook for another minute.

Stir in  lemon juice, olive oil and basil.

Add cooked pasta (half at a time, to make sure you have enough sauce...I had more than enough), cooked chicken, and Parm cheese. Toss to combine.

Garnish with extra basil leaves and Parm cheese.

ENJOY!

Printable Recipe

January 27, 2011

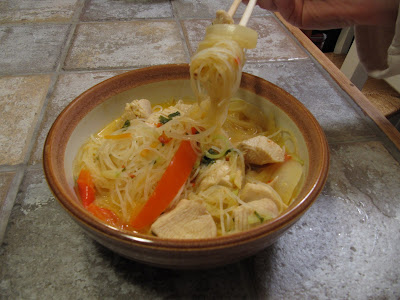
Red Curry Coconut Noodles

This is a delicious change from our regular weeknight meal rotation.

Actually, I don't have a weeknight meal rotation. I just cook whatever sounds good to me, and try to mix it up a couple times a week so that I have some new material to post here.

But this curry was a delicious change from the things we had been eating.

Steve was a little skeptical when I showed him the recipe, but he ended up loving it.

He ate most of the leftovers himself. 

It makes a TON. You could easily cut the recipe in half.

He even tried feeding it to his kids...not so much. They've come a long way since they started eating with me, but they aren't big on the Thai cuisine yet.

But that's ok! Because eventually I will turn them to the dark side.

This is also one of those recipes that is really adaptable, which I love because I rarely make the same thing twice.

Did I mention that once the initial prep work was done, it was super easy and fast?

Although if you don't cook Thai very often, some of these ingredients might be a bit foreign to you.

Don't panic - you can find most of them at your regular grocery store in the Asian aisle.

As always, feel free to ask questions in the comments section (at the very end of the post), and I will get back to you. 

I loved that we use the solid "fat" from the coconut milk to cook the chicken in...it imparts flavor as well as removes the need for any other "fat" such as butter or oil. 

This is another Tasty Kitchen recipe...I adapted it from Nika

Below is the recipe as I made it (yes, I changed things). I wanted more spicy, coconut-y broth so I added more liquid. I also added more ginger, cilantro and curry paste (because I love it) and more Thai Chili Sauce, because I love that too and I like lots of flavor!

Give it a try!


Red Curry Coconut Noodles (serves 8 - 10) adapted from Nika on Tasty Kitchen
  • 6 chicken boneless skinless chicken breasts, cut into small bite-sized pieces
  • 2 cans of coconut milk (full fat)
  • 1 tablespoon red curry paste
  • 2 tablespoons fresh ginger, minced
  • 1/2 cup of cilantro, minced
  • 1/2 cup Sweet Thai Chili Sauce
  • 32 oz fat free, low sodium chicken broth
  • 1 (8 oz) package of rice noodles 
  • 1 yellow onion, julienned 
  • 2 red bell peppers, julienned
  • 2 cups of broccoli slaw
  • 2 teaspoons chicken bouillon
Open the cans of coconut milk, scoop out the "solids" and place them in a large dutch oven over medium heat (reserve the rest of the liquid). Once the pan is hot, add the curry paste and ginger. Saute for 1 minute.

Add the chicken and saute until cooked through. Add the remaining coconut milk, the Thai chili sauce and the chicken broth. Bring to a slow boil, then reduce heat to simmer.

Add onion, peppers, broccoli slaw and rice noodles. Return to a simmer and cook for about 5 minutes or until the rice noodles are cooked through.

Add the cilantro and remove the pot from the heat. Let sit for 5 minutes and then serve, adding some yummy broth to each bowl.

Enjoy!

Printable Recipe 

January 17, 2011

Balsamic Chicken Pasta

Oh yum.

As I write this, I am wishing that I had some of this pasta to eat.

So, so good.

Easy.

Highly customizable.

Awesome.

I found this recipe on Tasty Kitchen, it is by the lovely Natalie at Perry's Plate.

You can see the original recipe here.

As usual, by the time I was done with it, it was almost unrecognizable (although I would be willing to bet the original version is delicious too...I just can't seem to leave well enough alone).

The first time I made it, I doubled the recipe, used rotisserie chicken, added asparagus, subbed feta cheese for the goat cheese and mozzarella cheese, subbed spaghetti for linguine, and added extra balsamic vinegar.

The second time I made it, I used bucatini pasta (I had some left over from a dish that Lyndi made the night before), rotisserie chicken, extra balsamic, dried basil instead of fresh, and mozzarella and Parmesan cheese.

I don't know which one I loved more.

The bottom line is, it's good no matter what.

My only suggestion is to use high quality balsamic vinegar and olive oil.

Take a look at this:

This was the first round. Yum.

And here was the second round. I know you can't really see it, but there is tons of grated mozzarella and Parmesan cheese in there.

I want to eat this now.

Here you go - make this for dinner tonight!

(See bottom of post for printable)

Balsamic Chicken Pasta (serves 4) adapted from Perry's Plate
  • 8 ounces of your favorite long pasta (angel hair, spaghetti, linguine, bucatini)
  • 3 cups chopped or shredded cooked chicken (I used rotisserie) 
  • 1 red bell pepper, julienned
  • 1 tablespoon minced garlic
  • 1 cup fresh basil, chopped or chiffonaded
  • 1.5 cups of cheese, crumbled or shredded (goat, Parmesan, feta, mozzarella, or a combination)
  • 3 tablespoons high quality balsamic vinegar
  • 6 tablespoons high quality olive oil
  • salt and pepper to taste
  • optional: 1/2 bunch asparagus, woody stems removed and cut into bite-sized pieces
Whisk together balsamic vinegar, olive oil, and salt and pepper. Set aside. 

Cook pasta according to package directions, drain all except for 1/2 cup of pasta water.

While pasta is cooking, saute garlic and red pepper until tender (if using asparagus, add it for the last 2 minutes of cooking).

Add chicken and basil to pan with veggies.

Stir in oil and vinegar.

Toss with pasta and cheese, add salt and pepper to taste.

Enjoy!

Printable Recipe

January 10, 2011

New Year's Festivities and Recipe Revamp: Buffalo Chicken Dip

Ahhhh Monday...why do you  hate me?

In an effort to get back into the swing of things, here are some pictures from Tara's party, and a couple from New Year's Eve.

Oh, and the buffalo chicken dip recipe is at the end.

If you are on a diet, I would highly recommend NOT making this.

It is so, so, so good.

And so addicting.

And decidedly not healthy.

Sorry!

...but it was the holidays!

And everyone knows that calories don't count around the holidays.

Why can't it still be the holidays???

Anyway, back to the parties!

Eli and I (right before he gave me a big wet willy!)

Me and my Tara (with Eli trying to get in too)


Yummy, delicious, Buffalo Chicken Dip. Sorry it is so yellow (artificial light).

These are the best pictures I could get of this amazing dip, without risking my arm getting chewed off

The spread: deviled eggs, buffalo chicken dip, hummus, a delicious olive tapanade-type dip that Erin brought, and an assortment of cheese and crackers (not pictured)

I miss you Tara!

Tanya, Marisa and Erin. Not in any of the pictures: Douglas, Cal, Lyndi and Steve. Don't ask me why. 
We had such a lovely time and it was so good to see Tara and Eli. Thanks everyone! 


Now for New Year's Eve.

Wait til you see the food porn.

We had an amazing dinner, beginning with baby potatoes that were baked and topped with melted cheese, sour cream, and bacon crumbles.

For our main course, we had Venison Tenderloin. My brother marinaded it, then seared it on the grill, then wrapped it in bacon and onions and finished it on the grill. It was amazing.

 We also had Prosciutto-wrapped shrimp brushed with BBQ sauce, and my Citrus and Herb Shrimp

And we had my Blow Your Frickin Mind Risotto, and a salad (not pictured). Oh, and lots and lots of champagne.


Everything was perfect.

Champagne with berries

Cal and Lyndi

Steve and I

Champagne and Pineapple/Orange Juice
And now, what you have all been waiting for...

Recipe Revamp: Buffalo Chicken Dip! (click here to read the original recipe post at your own risk)


Buffalo Chicken Dip (serves 8 - 10 as an appetizer)
  • 1 pound of boneless skinless chicken breast. (You can also use 2 large cans of pre-cooked chicken)
  • 1 cup of ranch dressing 
  • 1 cup of Franks Original Red Hot (do not substitute this please)
  • 1 8 oz block of cream cheese, softened
  • 2 cups of sharp cheddar cheese, shredded
  • Fritos Scoops and celery sticks for dipping
Preheat oven to 350 degrees.

Boil chicken breasts until cooked all the way through. Remove chicken to a plate and let cool - then shred it with two forks, or cut it into small cubes.

In a big bowl, mix the chicken, ranch, Franks, and cream cheese together (or use a hand mixer and mix the ranch, Franks and cream cheese until smooth...then stir in the chicken).

Mix half of the cheddar cheese into the chicken mixture, put into an oven safe casserole dish (I have a round glass one I like).

Put the rest of the cheese on top.

Bake at 350 until the cheese is melted and bubbly.

Serve with celery sticks and Fritos.

Enjoy!!!

Printable Recipe

January 5, 2011

Recipe Revamp: Chicken Fajitas

As I have mentioned before, while going back through old posts I have noticed several recipes that either have no pictures, have crappy pictures (most), have really confusing recipes, or don't have specific ingredient amounts (some of you are thinking, "So what's new?" He he he).

I don't really want to remove these recipes from the blog. Athough most of them were posted during a time when I was under a huge amount of emotional stress...and probably under the influence of wine...they are authentic pieces of me and what my life was like at the time - blurry, fragmented, rambling, random. 

So I'm just going to "Revamp" the recipes as I make them again and again, and add new and improved pictures when I can.

I never set out to start a food blog...I just wanted a safe place where I could vent and tell my side of the story...and if family and friends wanted to pop in every once in a while to see what was up in my world, they could.

Then I found that cooking was a great creative outlet for me, and that it was easier for me to have a post about cooking, intermingled with my commentary than it was to just drone on and on about my personal problems.

Last month I had over 900 hits here on Sunshine and Jellybeans.

It was my highest month ever. Normally I average around 500 hits a month.

I realize that compared to most of the cooking blogs I read, this is minuscule. I would be willing to bet that most of them average several thousand hits a month.

But it's a lot for me, and it kinda makes me proud (and a little freaked out).

I also realize that this isn't a very traditional cooking blog. Most cooking blogs are strictly cooking, with a picture here and there or a once-in-a-while mention of the blogger's private life instead of regular (and very personal) posts. I'm sure that this is annoying to some people ("Quit f-ing TALKING and give me a RECIPE!"), but it's therapeutic for me and I hope that some people like the more personal aspect of it.

Anyway...

Now I'll quit f-ing talking and give you a recipe.

You can click here to view the original recipe, as well as a recipe for Spanish Rice.

I made these fajitas on the stovetop, but I ALWAYS recommend cooking the meat and veggies on the grill. It really makes a huge difference. The recipe has instructions for both.

I always put way too much stuff on my tortilla, and then I can never get it closed. I usually just end up spreading my fixin's out over the open face tortilla and eating it with a fork.

Chicken Fajitas (serves 6)

This recipe is for chicken fajitas, but you can easily substitute beef, pork, or shrimp. Also - feel free to use other veggies such as cherry tomatoes or zucchini.

  • 2 lbs of chicken breasts
  • 2 bell peppers, cut into strips
  • 1 small onion, cut into strips
  • 1 lime, cut in half
  • 1 bunch of cilantro, chopped
  • 2 tablespoons of homemade or store bought fajita or taco seasoning (see my recipe here)
  • 8 - 12 flour tortillas (you can sub corn tortillas)
  • 2 tablespoons jarred jalapeno, minced
  • 2 tablespoons juice from jarred jalapenos
  • your choice of fixins: lettuce, tomato, sour cream, salsa, guacamole, taco sauce, black olives
Cut your chicken breasts into strips, and toss it with the juice from 1/2 of your lime, a generous handful of cilantro, 1 tablespoon of your fajita seasonings and 1 tablespoon of juice from your jar of jalapenos. In a separate bowl/bag, toss your cut up peppers and onions with the juice from the other 1/2 of your lime, a small handful of cilantro, the remaining tablespoon of fajita seasoning and the remaining tablespoon of jalapeno juice. Marinade both for 30 minutes to 2 hours.


To grill:
Preheat your grill to 375 degrees while the meat and veggies are marinading. Put meat and veggies on skewers (separately), or in separate grill baskets (we usually skewer the meat, and then put the veggies in a grill basket coated with oil).

Cook chicken and vegetables, stirring every couple of minutes until chicken is cooked through, and veggies are soft and starting to brown, about 5 - 10 minutes.

Wrap tortillas in aluminum foil and warm on grill for a few minutes. 

To cook on stovetop:
Add marinaded chicken and vegetables to a large skillet (including all the juices). Cook over medium heat until chicken is cooked through and veggies are tender.

Preheat oven to 350 degrees. Wrap tortillas in aluminum foil and warm in oven for a few minutes.

Top warm tortillas and filling with your choice of fixings.

Enjoy!

Printable Recipe

December 14, 2010

Chicken Parmigiana

Yummy Yummy Yummy.

Chicken Parmigiana is one of my favorite dishes of all time.

It's a bit labor intensive...especially if you make your own marinara sauce (which I did), but totally worth it.

It's comfort food that is fancy enough for company.


Come to mama.

Make this very soon.

If you have leftovers, you could make it into a Chicken Parmigiana hoagie!

I didn't include a marinara sauce recipe below because I'm still tweaking it.

You can use your own favorite recipe, a jar of premade, or below are a couple of my tomato sauce recipes that would also work:

Roasted Tomato Sauce (this is yummy and probably the closest thing to my marinara sauce that I have on the blog)

Spaghetti and Meatballs...from scratch (this is a little more labor intensive, but a yummy recipe to make for someone that you love)

Also - this recipe will give you a generous amount of coating for the chicken breasts...you could easily make 6 breasts with this amount of egg wash, flour and bread crumbs. Or you could cut the recipe in half if you were only making 2 or 3 breasts.

Chicken Parmigiana (serves 4)
  • 4 boneless, skinless chicken breasts
  • 2 cups of flour
  • 1 tablespoon of salt
  • 1 tablespoon fresh cracked pepper
  • 1 tablespoon garlic powder
  • 2 eggs, beaten with two tablespoons of water
  • 1 cup of crushed croutons (I used cheese and garlic croutons, Italian would also work well), you could also use Italian style breadcrumbs, but the croutons have a wonderful texture
  • 2 cups Panko breadcrumbs
  • 6 cups of your favorite marinara sauce (see above recipes)
  • 2 tablespoons Italian seasoning (thyme, oregano, etc.)
  • 1 tablespoon dried basil
  • 1 cup olive oil
  • 1 pound spaghetti or angel hair pasta
  • 1 cup Parmesan cheese, grated
Place chicken breasts in a large zip-top bag. Using the flat side of a meat mallet, pound breasts until they are thin. This will help them cook uniformly (is uniformly a word?). 

In one bowl (I use a pasta bowl) or plate, combine flour, salt, pepper and garlic powder .

In a second bowl/plate, put eggwash (beaten eggs plus water).

In a third bowl/plate, combine crushed croutons, Panko breadcrumbs, Italian seasoning and basil.

Dip each chicken breast first in the flour mixture, then in the eggwash, then in the breadcrumb mixture, making sure to coat both sides. Set aside.

Preheat oven to 450 degrees.

Warm your marinara sauce on the stovetop in an oven-safe pot or dutch oven (I used my Le Creuset).  Make sure that the pot is large enough to fit all of the chicken breasts because this will be the vessel that you will be using to finish the dish.

Cook pasta according to package directions.

Heat olive oil in a large frying pan to medium heat. Add the coated chicken breasts to the hot oil (working in batches if necessary), and cook until the bottom of the breast is starting to get nice and brown. Flip over and repeat on the other side.

Place browned chicken breasts on top of the marinara sauce in an oven-safe pan, sprinkle each breast generously with Parmesan cheese. Place the dish uncovered into the oven and bake for 10 minutes or until sauce is hot and cheese is melted and bubbly.

Plate by adding some noodles, topped with a chicken breast and some extra sauce. Finish with more grated Parmesan cheese, if desired.

Enjoy!

Printable Recipe

December 7, 2010

Finger Lickin' BBQ Chicken and Kempton Update

Happy Tuesday droogies!

Is it Thursday yet?

My mom and dad are coming to town on Friday and staying with me Friday night, then Lyndi is coming on Sunday and staying with me for a little while (until she finds a place)! My hide-a-bed is going to be busy!

I'm having a hard time stringing together coherent thoughts today, but I wanted to give ya'll an update on Kempton.

I brought him home from the vet on Friday, and I'm pretty sure they were ready to be rid of him. The ladies at the front desk said (kindly) that he had been whining and howling all day. The surgeon said that he was making good progress - already "toe-touching" and allowing them to do some range-of-motion exercises.

Steve and I loaded him up in the car and brought him home. Steve had to go back to work, and by the time he got home I had 2 bottles of wine down, er...already started drinking, um was ready to pull my hair out.

The ladies at the vet were right.

Incessant whining.

Whining like I have never heard before.

I literally was waiting for him to go hoarse.

It never happened.

It was the most frustrating thing about this whole experience...it didn't matter what I did.

Hug you? No. Pet you? No. Ignore you? No. Feed you? No. Ice your leg? Warm pack it? Leave it alone? Take you out to pee? Make you rest? No no no no no.

He had his pain patch on still, as well as taking an anti-inflammatory, glucosamine and anti-biotics. There wasn't anything else I could do for him. I laid down on the floor next to him and snuggled him and talked to him...he just whined the entire time.

Thankfully, by Sunday he had calmed down and given into the fact that he was exhausted (so was I).

Now his personality is pretty much back to normal. He isn't quite as fiesty, but that is to be expected (and it's probably good because he needs to take it easy).

He and I are meeting with his physical therapist tomorrow after work to get more exercises and massage techniques that will help get his range of motion back and also help with his hips.

The only issue that we are having is with his cone.

You know, that ridiculous collar that looks like a lampshade?

Yes, he is suppose to wear one of those when we are not home.

He is an escape artist.

It doesn't matter what we do or how tight we put it on, he can get out of it.

He thrashes around and plows into stuff (we sat downstairs and listened one day), and I am worried it is going to do more harm than good. So I've been leaving it off, but he has been licking his incision and not allowing it to heal. I am waiting for the surgeon to call me back and give me some suggestions.

I have some pictures, but I haven't had a chance to upload them yet.

In the meantime, I am going to post my recipe for BBQ chicken on the grill (charcoal grill).

I know grilling season is over, but Steve has a hard time letting go so we continue to shovel the deck off and use the grill during the milder days of winter.

The real gem here is the method...you can use whatever rub and/or sauce you would like.

The thing you need to remember is that bbq sauce is high in sugar, which burns at a relatively low temperature...so don't add your sauce until later in the process. That is where a rub comes in handy...it imparts flavor while the chicken is cooking, but doesn't burn and get all bitter.

Check it out - and try this soon (as soon as you can chisel your grill out of the snowbank).


Finger Lickin' BBQ Chicken...On The Charcoal Grill (serves 4)

  • 6 chicken breasts (I use the bone-in kind for this...boneless, skinless dries out too fast)
  • 3 tablespoons BBQ rub (I use Penzey's BBQ 3000, but you could also make your own)
  • 3 cups of BBQ sauce (plus extra sauce stored separately to serve); you can find a recipe for my bbq sauce here
Pat your chicken breasts dry with paper towels, and then liberally add bbq rub and massage into chicken. Set aside.

Start your grill, and when the coals are hot, move all of them over to one side. This makes one "hot" side and one "cold" side (don't worry, the cold side isn't actually cold...just cooler than the hot side).

Place the chicken on the cold side of the grill, skin side down, and cook covered until skin starts to brown (about 15 - 20 minutes)*.

Flip chicken and move it to the middle of the grill. Start flipping and basting with bbq sauce every five minutes for 20 minutes...the chicken should start to get nice and sticky.

Move chicken to hot part of the grill, basting and flipping until chicken becomes crusted on the outside, and a meat thermometer inserted into breast reads 165.

Remove from heat and let rest for 5 - 10 minutes. Serve with extra sauce.

Enjoy!

* You might need to do this in batches if you have a small charcoal grill

Printable Recipe

November 8, 2010

Chicken Noodle Soup

As I mentioned last week, a sudden winter storm put me in the mood for the ultimate winter comfort food: Chicken Noodle Soup.

I posted my recipe for Homemade Chicken Stock on Thursday, and you should make it as soon as possible.

I wasn't going to post my recipe for chicken noodle soup, because once you have the stock the rest is a cake walk.

Although I'm not really sure what a cake walk is.

But then I got really lazy this weekend and didn't take any pictures of any of the food I cooked.

You see - Steve and I went up to the cabin for one last weekend before we had to put the boat away. If you've been reading this blog since the beginning, you will remember that we went up the same weekend last year (you can read about it here).

Except last year we had the shadow of Steve's forthcoming chemo treatments (that started the following week) to worry about.

Thankfully we didn't have those worries this year.

Like last year, the weather was gorgeous and we had a blast - boating, saunaing, relaxing, eating...

And this year we had the bonus of hanging out with some friends Saturday night/Sunday morning (thanks Mark, Gale and Georgia!)!

The weekend flew by and I didn't want to go home.

We ate some delicious food - on Friday night we marinaded and grilled some fresh partridge that my dad gave us (the original organic, free range poulty!), and on Saturday I made a big pot-roast in the crock pot.

But I was a total slacker and didn't take any pics.

All weekend.

Not one!

So today I am going to post the chicken noodle soup recipe instead.

I hope you don't feel like it is too much of a consolation prize...

It's delicious, easy and it will warm you from the inside out!

Mmmmmmmmmmmmmm!!!

Chicken Noodle Soup (serves 8 - 10)
  • 6 quarts Homemade Chicken Stock
  • 2 lbs cooked chicken, shredded or diced
  • 6 celery stalks, washed and diced
  • 6 large carrots, washed and diced 
  • 1/2 a large yellow onion, diced
  • 3 tablespoons butter 
  • 1 lb dried egg noodles (less if you want the soup less thick/hearty)
  • 2 - 4 tablespoons chicken bouillon (to taste)
  • salt and pepper
  • dried herbs such as basil, oregano, thyme, and/or parsley (optional - to taste)
 Saute celery, carrots and onions in melted butter until crisp-tender. Add chicken and stock, bring to a low boil. Reduce heat to a simmer and check seasonings. Add bouillon, salt and pepper to taste. Return to a boil, add egg noodles and simmer until cooked through. Check seasonings again and if desired, add dried herbs (but if your stock is really flavorful, you might not need to add any herbs). Enjoy!

Printable Recipe

November 4, 2010

Homemade Chicken Stock

Last week we had our first winter storm.

It dropped (on average) 7.1 inches of snow in Duluth.

Typically, I am not a fan of winter.

Since I met Steve, however, it has become more tolerable.

First, because he loves winter.

I mean loves it.

And he convinces me to get out and play in the snow, which makes it go by faster.

Second, because if I am going to be cooped up in the house while it's snowing and blowing and dark (have I mentioned how much I hate daylight savings time?), at least I will be cooped up with him.

Third, because he has a snowplow.

Fourth, because he has a shovel, and he's not afraid to use it.

Besides Steve, the only other things that get me through winter are good books and soup.

And SmartWool socks.

Anyway...

One of the main ingredients in several of my favorite winter soups is chicken stock!

Now, you can always buy store-bought chicken stock...

...but it's expensive.

And the flavor isn't as rich (which means it won't make as yummy soup!).

And if you are watching your sodium intake, store-bought stock is higher in sodium, even though you still need to add salt to it for most recipes.

My point is, homemade stock is better, even though it adds steps/time to your soup recipe.

 Yum.

My solution is to make large amounts of it.

I have a large stockpot that must be around 20 quarts that I use (after I remove the chicken and veggies and strain the broth, it leaves me with about 2  7-quart dutch ovens full). This makes enough for 2 - 3 large pots of soup.

Whatever I don't use right away, I put in containers or zip-top bags and freeze it.


Here is a basic recipe for homemade chicken stock, and then please see my notes below for more specific instructions and substitutions.

Homemade Chicken Stock
  • 8 pounds of chicken pieces (carcasses, wings, roasting chickens, etc.- whatever you have)
  • 6 large carrots, washed and cut into large pieces
  • 4 celery stocks, washed and cut into large pieces (leaves and all!)
  • 1 medium onion, quartered (skin and all!)
  • 10 or more sprigs of fresh dill (trust me!)
  • 10 - 20 sprigs of fresh thyme, oregano, and/or rosemary
  • 10 whole peppercorns
  • 6 cloves of garlic
  • water
 Throw everything into a large stockpot or dutch oven and cover with water. Bring to a boil and let it simmer for 4 - 6 hours. Strain stock through a fine-mess strainer into another container. Let it chill overnight or until fat solidifies on top. Remove fat. Use immediately, or place in plastic containers/zip-top bags and freeze.

* If I am going to make chicken noodle soup (or some other soup that calls for chicken), I will throw a whole chicken in the stock pot, bring it to a boil and simmer it for about 45 minutes (or until the legs pull away easily). At this point, I will remove the whole chicken from the stock, let it cool, pick the meat off the bone, and then throw the carcass back in. You don't want to simmer any chicken that you are going to eat for 4+ hours - it will be like rubber. You can also use the carcasses from rotisserie chickens.
** If you aren't watching your sodium, substitute some of the water for fat-free, low sodium chicken broth. This will provide a richer flavor.
*** If you don't have fresh herbs, you can substitute dried, or use a combination. Last time I used fresh thyme, but dried oregano and also some red pepper flakes. Try to use the fresh dill though! It adds something extra (though it doesn't impart a strong dill flavor on your soups).
**** If you don't want to wait overnight to skim the fat off, cool stock down enough to pour into a fat-separating pitcher; or pour into large zip-top bags, seal top of bag, cut bottom corner off of bag (fat will have risen to the top) and pour the stock into a pot, pinching the corner of the bag to prevent any of the fat from going in the pot...discard bag with remaining fat in it. I prefer to plan ahead and chill it overnight...because it is so much easier to skim the fat off:


Stay tuned for a recipe for delicious chicken noodle soup...using homemade chicken stock, of course!

Printable Recipe